


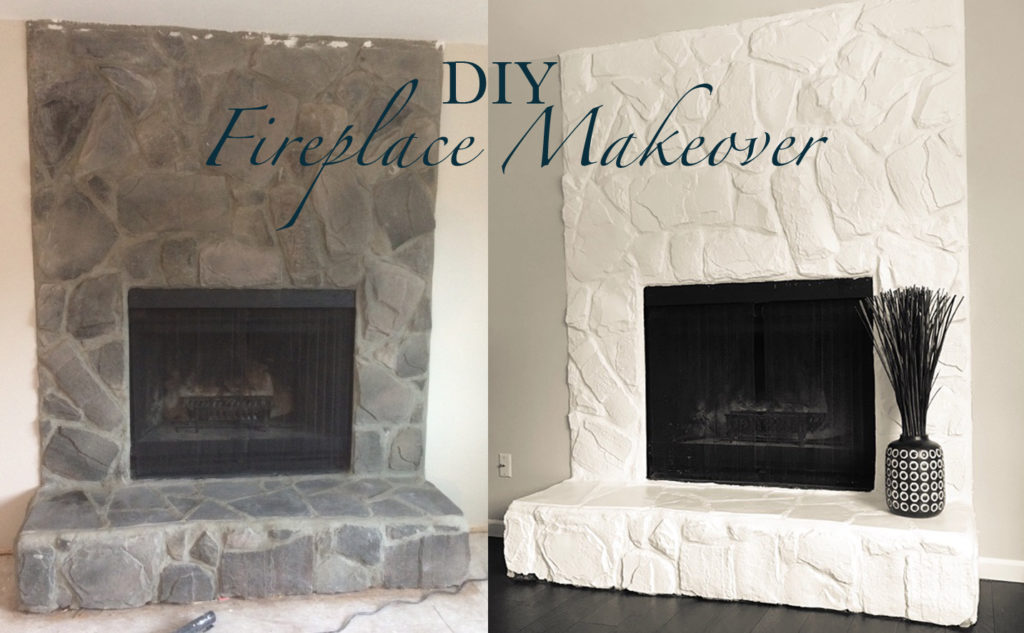
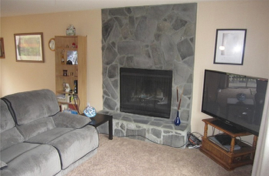
One of the first things I did when we moved into our new home was give our fireplace a much needed makeover. It was a horrible faux stone that looked dirty and made the entire room look heavy and dark. This was an incredibly easy project (one of the easiest ones so far actually!) and it completely changed the look of the room. I wanted to share with you how this project was done so that you can take your stone or brick fireplace and transform it over the weekend!
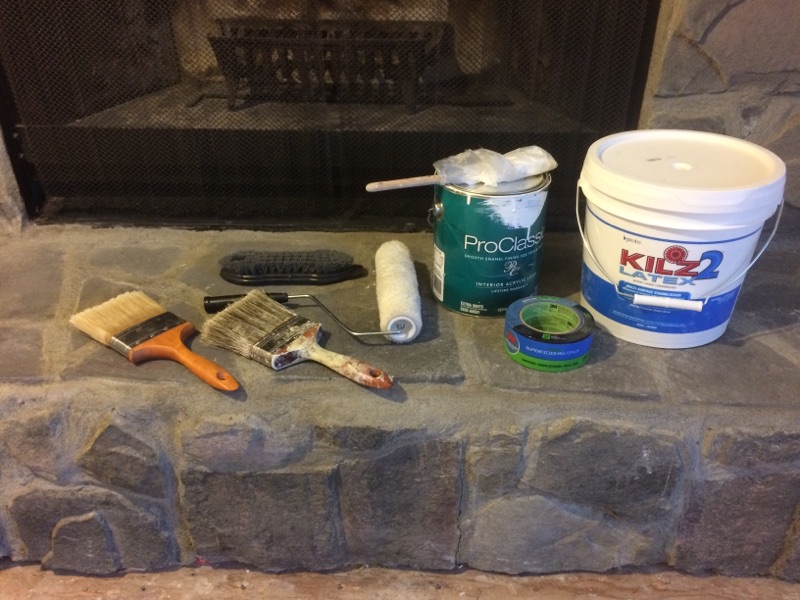
Here is what you will need:
- Paint Brush (or several)
- Roller
- Wire Brush (or similar) & Bucket
- Primer
- Paint
- Masking Tape
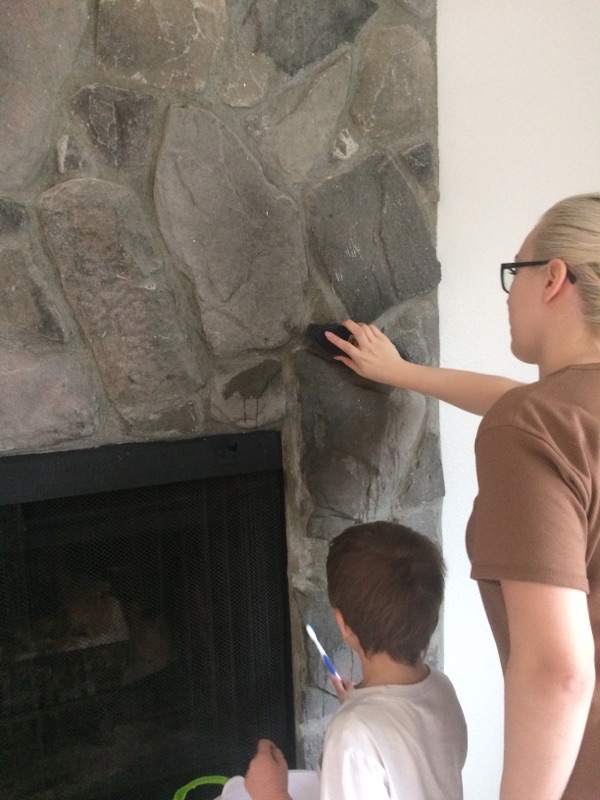
Our house was built in the 70’s, and this fireplace had probably never been cleaned, so I started out by giving it a good scrubbing with a bucket of hot water and a wire brush (Jason helped out with a toothbrush).
Once we thoroughly scrubbed the fireplace, I let it dry overnight. Then, using masking tape we taped off all of the edges of the fireplace so paint wouldn’t get on the walls or ceiling. As you can see in the before picture, we didn’t have any flooring down so I didn’t need to worry about that. If you have flooring installed that you plan on keeping, you will want to protect that with some drop cloth because this can get messy.
When you are done taping off the fireplace you can start priming! I used Kilz 2 Latex Primer and it worked great. The stone was very porous so I used a heavy brush and would paint the stone in a swirling motion while also having to “smush” the brush in areas with deeper crevices. You may want to use a brush that you wont need again because this did some damage to the brush.
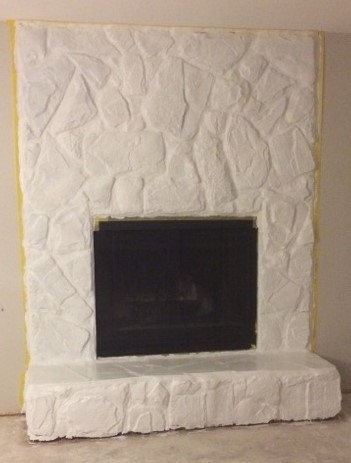
After the primer dried I started on the first coat of paint. I used Sherwin Williams ProClassic Interior Latex Paint in a semi-gloss finish. I wanted the fireplace to be easy to clean and this was the perfect quality paint for that. I applied the first coat of paint in the same way I applied the primer, making sure no drips were forming. I would use the roller brush to paint over the flat surfaces of the stone so that no brush marks were visible. The stone was very porous so it would soak the paint right up! After the first coat dried, I applied the second coat which went on smoothly. Depending on the porosity of your stone, you may even need a third coat but I didn’t find it necessary.
When the paint was all dry, I took the tape off and voilà! My fireplace makeover was complete. You can see how it really changed the look of the room in these pictures (obviously the new flooring and fresh coat of paint helped as well, but more on that later):
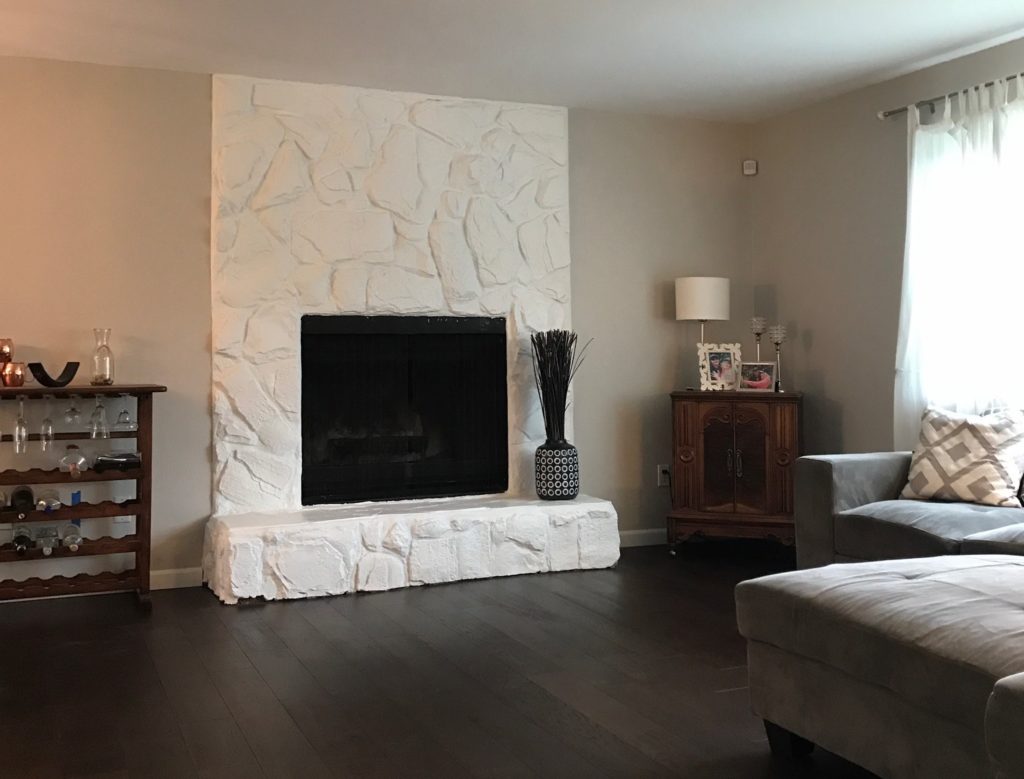
I will be replacing the wood burning fireplace with a gas insert this Fall, so I’m not as concerned with getting soot all over my bright white fireplace! If you do have a wood burning fireplace and you plan to paint it white, be sure to get a gloss or semi-gloss paint that is high quality and easy to clean, and keep in mind you may have to put a fresh coat of paint on it every few years. Please share your DIY Fireplace Makeover in the comments!
Until next time,
Justine

